
By Jonathan Baldassare, MTI Contributor
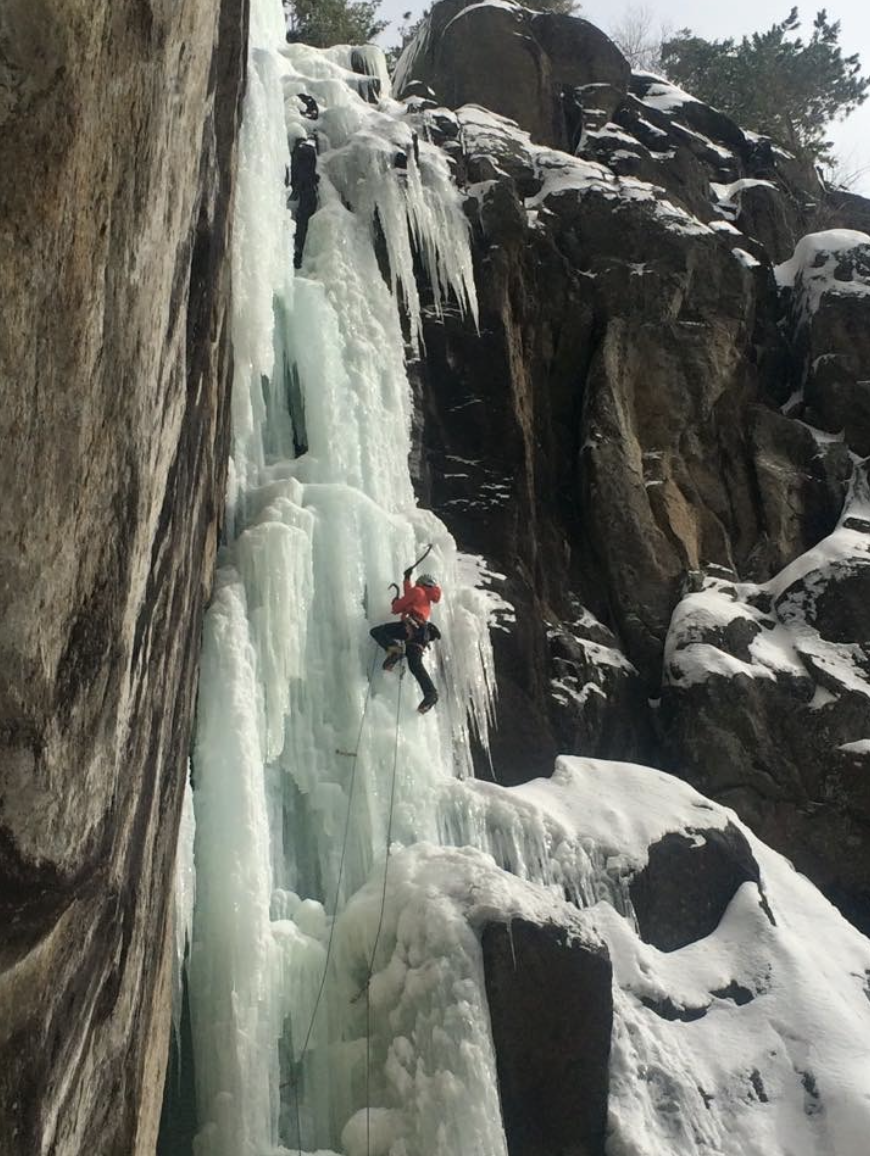
With the rock climbing season winding down in the coming month, I find myself thinking about the joy of swinging tools and bashing ice more and more often. Just as rock climbing can be somewhat akin to ballet in the vertical realm, i have always thought of ice climbing as a much more thuggish endeavor. Like battling a dragon; with their fearsome size, tooth and claw-like icicles perched menacingly above you, and (in cold enough conditions) a veneer that is not easily breached with even the sharpest of steel. Success on these ice dragons requires physical strength, mental fortitude, and the right equipment.
But the quiet beauty and pure adventure that climbing frozen waterfalls provides does come at a cost. Literally. Climbing gear isn’t cheap, and winter climbing requires a lot of it. Rock season is easy to gear up for; rope, rack, harness, shoes, chalk bag, and you’re ready to go. But transitioning from your standard rock climbing kit to ice climbing requires a lot more thought. A good place to start is by formulating a basic ice climbing loadout; All the gear that you need (and nothing you don’t) for a typical day out ice climbing in the most average of weather and ice conditions.
I’m based in the northeast, and with the exception of high altitude objectives, the area offers a wide range of winter climbing disciplines. From steep 500’ WI5+ pure ice routes to hard mixed lines, to alpine gullies on Mount Washington (touted as home to the world’s worst weather). There is something for everyone here, and I’d wager that my basic loadout would translate well to any aspiring ice climber in the lower 48.
Below is the kit I bring for day of climbing 1-3 pitch ice climbs in 15°F to 30°F weather. Once you have your basic kit sussed out, you can make adjustments to accommodate specific missions/adventures and weather conditions.
The Action suit
The first thing needed for slaying ice dragons is armor, or what I call my “action suit.” Stupid name? Maybe, but it’s my go-to outfit that I wear up most routes. When I started climbing, the “onesie” (one-piece Gore-Tex suit) was the ultimate outfit. Then, Gore-Tex shell jackets and bibs were all the rage. These days I prefer soft shell jackets and pants as they offer some degree of water and wind resistance, but also stretch: thus allowing a trimmer fit without restricting movement.
-
- Arcteryx Siphon FL Hoody & Pants (https://www.regear.arcteryx.com/p/arcteryx-psiphon-fl-hoody-mens-mens/17102) -are my first line of defense, and what I climb in 75% of the time. The hood is an important feature here, so be sure its compatible with your helmet. The Black Diamond Dawn Patrol (https://www.blackdiamondequipment.com/en_US/product/dawn-patrol-shell/?colorid=3900) models are also solid choices.
- Outdoor Research Ascendant Hoody (https://www.outdoorgearlab.com/reviews/clothing-mens/insulated-jacket/outdoor-research-ascendant-hoody) -serves as my main insulating layer (also hooded). Outdoor Research has discontinued this model, but most technical fleece hoodies will suffice. I like this one because the outer nylon material has some shell-like properties (like wind resistance), and I’ll wear it as such (without any layer on top) on approaches, and in mild and dry conditions. Plus, whatever type of fleece they use for the inside is noticeably warm, cozy, and soft to the touch. Due to the versatility of this layer and the Siphon FL Hoody, I can choose to wear one or the other or both at the same time if the conditions dictate.
- Smartwool’s Classic Thermal Merino Base Layer -top and bottoms- (https://www.smartwool.com/shop/mens-base-layer-tops/mens-merino-250-base-layer-quarter-zip-sw016355?variationId=M54) are my favorite base layer items.
- As for socks, I just wear a single pair of heavy winter wool socks (no brand in particular) -more than one pair tends to restrict blood flow to your feet, making them colder.
- LaSportiva’s Trango Ice Cube GTX (https://www.lasportiva.com/en/trango-ice-cube-gtx-black-11pbyn) -is the lightest pair of mountain boots in my quiver, and my “go-to” for when the temperatures are mild enough to get away with wearing them. A warmer alternative is the LaSportiva G5 Evo boot (https://www.lasportivausa.com/g5-evo.html) -both of these models offer an integrated gaiter system that streamlines the entire boot and makes it so that you don’t have to wear those dorky Gore-Tex gaiters of yesteryear.
- Gloves are one of the most important components of what I pack into the mountains, and almost deserve an article on its own. Knowing full well that what you wear on your hands will get wet, I bring at least 3 pairs of gloves and a pair of insulated mitts with me to switch out and stay dry.
- I like a thin pair like the Black Diamond Torque Gloves (https://www.blackdiamondequipment.com/en_US/product/torque-gloves/?colorid=5940) for harder routes when the temps allow.
- The main gloves of the action suit is something like the Black Diamond Punisher Gloves (https://www.blackdiamondequipment.com/en_US/product/punisher-gloves/?colorid=5952), and I bring 2 pairs. The proprietary “BDry” shell that they use works well for keeping water out while being fairly durable. When the gloves finally do wear out (and they will), they are at a price point that won’t hurt your wallet too much. You probably can expect to get 2-3 seasons of moderate use out of them before the seams begin to fail.
- Lastly, I love to have some trusty mitts in my pack to use at belays, or for when the weather takes a turn for the worse. The Black Diamond Mercury Mitts (https://www.blackdiamondequipment.com/en_US/product/mercury-mitts-mens/?sku=BD8018890002SM_1) provide some peace of mind when things get chilly. In sub 0° temps, I often toss a hand warmer packet in between the shell an insulating layers of my mitts-so nice for when you get to the belay.
- It should be noted that there IS a difference in gloves that were designed for ice climbing, and ones designed for skiing or all-around use. The biggest difference is that climbing gloves are designed to close around ice tools much more easily than the others, thus making holding onto the tools throughout a climb easier (which is kind of important).
- A Beanie style hat and a lightweight Buff complete the outfit…and don’t forget a cloth handkerchief!
Additional Layers
-
- The Arcteryx Alpha FL (https://www.outdoorgearlab.com/reviews/clothing-mens/hardshell-jacket/arcteryx-alpha-fl) is my hard-shell jacket that I turn to for when the going gets tough (i.e. wet, cold, or windy), and I would be remiss to go out to the backcountry without it. This shell combined with high quality soft-shell pants (with working Durable Water Repellent -DWR- coating) is sufficient for me for most missions. Hard shell pants or bibs should also be in your quiver, but I tend to leave them at home unless conditions are unknown or dictate otherwise.
- Arcteryx Cerium LT (https://www.outdoorgearlab.com/reviews/clothing-mens/down-jacket/arcteryx-cerium-lt-hoody) -although a little light to be a true “belay jacket,” I find that it’s warm enough for me for most days (I switch it out for a heavier conventional “over-everything” down jacket when the mercury drops below 0°). I wear the same size Cerium as I do everything else, which can feel a bit like “fat guy in a little coat” at belays when putting it on top of everything else that I brought for my upper body. But the trade-off is that it can be more easily worn under my hard-shell to protect the down in extremely wet conditions. Versatility is the key to minimalist comfort in the mountains, and sometimes it feels nice to switch out the soft-shell for a down jacket under a hard-shell.

Ice Tools
Slaying dragons requires battle axes, and although the make and model of ice tools is largely personal preference, three things remain true: 1.) The sharper the better, 2.) leashes are a thing of the past, and 3.) different tools are better for different jobs
-
- If I could only climb with one set of tools for the rest of my days, they would be the Petzl Nomics (https://www.petzl.com/US/en/Sport/Ice-Axes/NOMIC), as they are the best modern all-around ice tool for me. That said, I primarily use the Petzl Ergonomics (https://www.petzl.com/US/en/Sport/Ice-Axes/ERGONOMIC), as I find them to perform a bit better on the steeper terrain that I am most drawn to.
- I equip both models with a pommel spike (for caning), pick weights (I like a heavier tool), and mini hammers (both for hammering pitons and because -in the event of the tool popping out unexpectedly- it’s better to get hit in the face with a hammer than the blade of an adze).
- Pro Tip: If you climb with petzl tools on just ice (with limited mixed climbing), try swapping out the picks for a set of Petzl PUR’Ice picks (https://www.petzl.com/US/en/Sport/Ice-Axes/PUR-ICE). The sticks are so good, it almost feels like cheating.
- I equip both models with a pommel spike (for caning), pick weights (I like a heavier tool), and mini hammers (both for hammering pitons and because -in the event of the tool popping out unexpectedly- it’s better to get hit in the face with a hammer than the blade of an adze).
- I use the Petzl Dart Crampons ( https://www.petzl.com/US/en/Sport/Crampons/DART) in mono point configuration for the vast majority of my winter climbing. I like how modular and customizable the Darts are, and I prefer the chromoly steel that Petzl uses to the weaker stainless steel offerings from Black Diamond Equipment.
- Whichever brand you choose, anti-balling plates are very nice to have to keep snow from sticking to the bottom of your boots in warmer and/or wetter conditions.
- Harness- I use the Arcteryx FL-365 (https://www.arcteryx.com/us/en/c/mens/climbing-gear?sub-cat=harnesses) equipped with four Petzl Caritool clips (https://www.petzl.com/US/en/Sport/Harnesses/CARITOOL)- for easy access to the screws.
- Helmet- I like the Petzl Meteor and Sirocco helmets (https://www.petzl.com/US/en/Sport/Helmets), but the brand is another personal preference item. But DO wear one, it’s not 1982 anymore.
- If I could only climb with one set of tools for the rest of my days, they would be the Petzl Nomics (https://www.petzl.com/US/en/Sport/Ice-Axes/NOMIC), as they are the best modern all-around ice tool for me. That said, I primarily use the Petzl Ergonomics (https://www.petzl.com/US/en/Sport/Ice-Axes/ERGONOMIC), as I find them to perform a bit better on the steeper terrain that I am most drawn to.
The Rope
Just as with ice climbing boots, tools, and crampons; there are different ropes for different jobs (i.e. single ropes, double ropes, twin ropes). For the context of this article, my most common rope is a thinner (9.2-9.4mm) 70M single rope. Sterling Rope (https://sterlingrope.com/) and Mammut https://www.mammut.com/us/en) are my trusted brands for ropes. Whichever rope(s) that you choose, be sure that it is a “Dry” treated rope, and that it’s not so old that the dry treatment coating has worn off. Ropes that do not have this coating will likely handle like steel cables shortly into your day.
The Rack
Just as spring-loaded camming devices (cams) changed the game for rock climbing, so too has the modern ice screw. Sharp modern ice screws can offer a solid anchor point within seconds and, with the steel/aluminum hybrid design, they are lighter than ever.
-
- 8-10 Petzl Laser Speed Light screws (https://www.petzl.com/US/en/Sport/Anchors/LASER-SPEED-LIGHT) compose my standard rack. Black Diamond also offers a version of ultra-light aluminum ice screws, which are also great -I have Petzl because they were the first to develop the technology, and I already had a selection of their orange screws before BD came out with their green ones.
- Two 10cm “stubby” screws (red handle)
- Six 13cm screws (yellow handle) are what I primarily use for lead protection and anchors.
- All screw sizes from 13cm length and larger have the same amount of threads on the body. Since ice screws get their strength from these threads, a 13cm screw in good ice can be as strong as a 17cm or 21cm -just faster to place. That’s why the 13cm make up the bulk of my rack.
- Two 17cm (blue handle) or 21cm (green handle) screws for anchors and building v-threads.
- In early season, I also carry a Black Diamond Spectre Ice Piton (https://www.blackdiamondequipment.com/en_US/product/spectre-ice-piton/) for those thin (or unknown) top-outs.
- Eight standard quickdraws (I have Black Diamond Equipment draws with a wire gate on the carabiner that clips the rope) and two “alpine draws” are what I use to clip lead protection.
- One double-length (48”) dynex sling and two cordelette length (70”-96”) dynex runners are my primary anchor building material. Dynex and Dyneema do not absorb as much water as typical nylon accessory cordage, so I prefer these materials for winter climbing.
- I do, however, bring a length of accessory cord with me for v-threads and/or beefing up fixed anchors. A v-thread tool is also in my kit, like the Petzl Multihook (https://www.petzl.com/US/en/Sport/Anchors/MULTIHOOK) -but a homemade coat hanger tool works just as well.
- Finally, four to five locking carabiners, a Sterling Hollowblock (https://sterlingrope.com/hollowblock2/), and a Petzl Reverso (https://www.petzl.com/US/en/Sport/Belay-Devices-And-Descenders/REVERSO) round out the rack. To quote the guys from the YouTube channel “hownot2,” all of the carabiners and belay devices that were made for climbing and sold at all the usual retailers are “super good enough” in terms of safety. I’m currently running all Petzl lockers (because they work well AND they are all the same color), but I also like Black Diamond and Mammut hardware.
- 8-10 Petzl Laser Speed Light screws (https://www.petzl.com/US/en/Sport/Anchors/LASER-SPEED-LIGHT) compose my standard rack. Black Diamond also offers a version of ultra-light aluminum ice screws, which are also great -I have Petzl because they were the first to develop the technology, and I already had a selection of their orange screws before BD came out with their green ones.
The Pack
My all-time favorite pack is the Arcteryx Alpha FL30 (https://arcteryx.com/us/en/shop/alpha-fl-30-backpack). Arcteryx fanboy? Kind of, but the function, fit and finish are on point (as it ought to be for the prices they charge). Plus it looks good, and when you look good you climb good, and when you climb good you climb safer; ergo looking good=safety. Inside this pack lives all the other mountain essentials.

-
- First Aid Bag (3L sea to summit dry bag w/ window) to store the following
-
- Adventure Medical First Aid Kit w/ additions (https://www.adventuremedicalkits.com/medical-kits/ultralight-watertight/ultralight-watertight-7.html)
- Israeli-style bandage
- tourniquet
- heavier-duty reflective blanket/tarp
- topo map of area and compass
- small lighter
- small tube of sunscreen
- Vacuum packed towelettes
- Two Headlamps (1 primary headlamp like the Petzl Swift RL (https://www.petzl.com/US/en/Sport/Headlamps/SWIFT-RL), and 1 emergency headlamp-like the Petzl E+Lite (https://www.petzl.com/US/en/Sport/Headlamps/ePLUSLITE). Unlike many of the items in this article, I DO believe that the brand is important with this one. I’ve experienced too many failures with both climbing partners and clients using other brands. Petzl headlamps, in my experience, are the most trusted products in the industry.
- Lightweight knife
-
- Thermos of tea
- Snacks and food
- goo, shot blocks, hard candy, protein bars (be sure to put them in your warm jacket before attempting to eat).
- sandwich (or whatever) for lunch.
- First Aid Bag (3L sea to summit dry bag w/ window) to store the following
Packing for the first couple of outings takes the most thought and consideration before it starts to feel routine. All said and done, this is a pretty good starting point when gearing up for those first swings of the season. Your mileage may vary (e.g. maybe you have extra sweaty feet and extra socks or a vapor barrier liner makes sense for you, or maybe you drink a lot more than a thermos of tea throughout the day), so make adjustments as necessary.
Putting together the perfect kit is a matter of trial and error and takes time to iron out. Finding the balance of being prepared and traveling light is an ongoing and evolving challenge. Be realistic with what you will need, then add a bit extra for insurance in the event that the weather takes a turn for the worse, or you end up staying out longer than expected.
Geek-out, research new gear, and talk to your climbing peers about the equipment that they prefer, and why. Find out what works well for you, and go out and slay some dragons!
Jonathan Baldassare is an all-around climber and guide based in the Northeast.
******* Paid MTI Contributors Wanted! Send a resume and 3 specific topic ideas to rob@mtntactical.com