By Rob Shaul
A decade ago when I began programming for climbers I bought every book on climbing training in print, read like crazy, and tried to apply the programming other coaches described.
It was a disaster. Vague terms like “power,” “power endurance,” “strength,” and “endurance” were defined around a hard to quantify measurement tool called “hand movements.” For example, the effort was considered a strength effort if it involved six or less hand movements and pushed the athlete to near failure.
When I tried to deploy this programming at the local rock gym many issues arose. Bouldering problems and top-roped climbing routes with the same climbing rating could have vastly different actual levels of difficulty. As well, once we seemed to be able to get a group of problems identified which would work for our programming goals, the gym’s route setters would change or move one or more of the routes, causing us to start all over from scratch.
Without a way to clearly quantify training load, volume, and intensity, I was programming blind, and as a result, the training did not result in measurable improvement for my athletes.
I needed a new approach to climbing training, and a new method of measuring training load and intensity. I went to my notebook and developed time under tension as a basis for MTI’s rock and ice climbing program design.
The Barbell Comparison
Imagine you’re in my gym and standing before a barbell resting on the floor. We’re doing deadlifts, and I ask you to begin loading the barbell and work up to your 12RM – or highest load you can lift 12 reps for.
After, I ask you to now find your 6RM – the most load you can lift 6 reps for.
Finally, I ask you to find your 1RM – the most load you can lift 1 rep for.
For each final effort (12RM, 6RM and 1RM) I secretly time you – to see how long it takes you to complete the actual reps. The chart below is your loading and time to complete the effort:
Effort Load Time to Complete
12RM 225# 16 seconds
6RM 275# 10 seconds
1RM 315 3 seconds
What you’ll see here is that the higher the load, the less time it took you to complete the required reps. Another way to say this is the higher the intensity (load), the shorter your “time under tension.”
This idea of “time under tension” is used by some coaches for free weight-based strength training, where instead of prescribing reps, they will prescribe a load and ask the athlete to complete the maximum number of repetitions possible in a certain amount of time.
In applying this “time under tension” concept to rock and ice climbing training, and to keep it simple, I developed three categories of training based on duration, (1) strength, (2) work capacity and, (3) stamina, and based on my experience, assigned durations to each.
Below are the simple training charts I developed years ago that still serve me today. As you look at these charts notice the difference in work capacity and stamina durations for ice climbing. This is because ice tools with their ergonomic handles are simply easier to hang on to than rock holds.
Rock Climbing:
Category Duration
Strength <1 Minute
Work Capacity 1-4 Minutes
Stamina 4+ Minutes
Ice Climbing:
Category Duration
Strength <2 Minute
Work Capacity 2-6 Minutes
Stamina 6+ Minutes
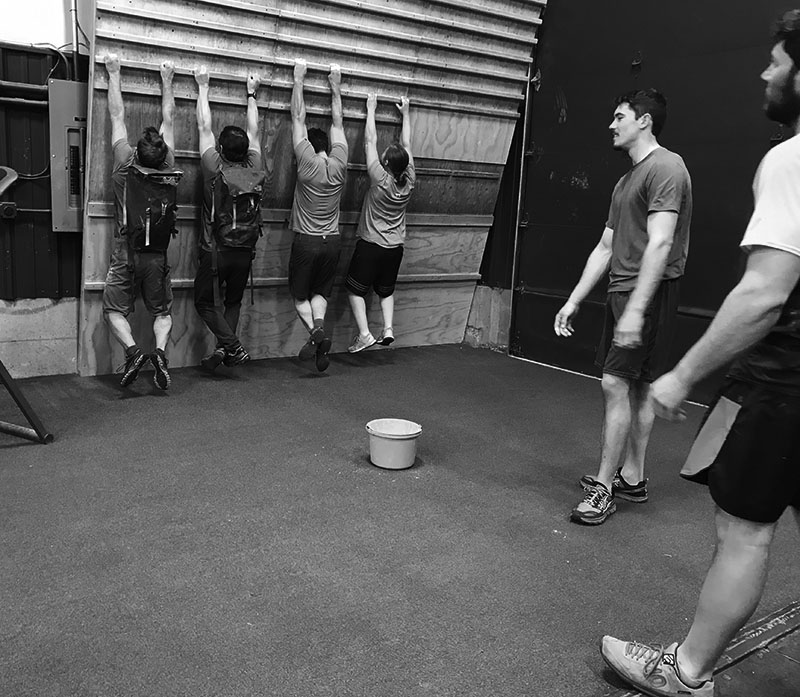
Above – Ice Climbers training Work Capacity (5-minute intervals) on our “tech board.”
Back to the Rock Gym – and more Failure!
Armed with these new training categories, and corresponding training durations, I was able to develop focused training sessions built around the categories – for example, a strength session build around short, loaded hang board dead hangs, or long “stamina” sessions build around extended efforts (4+ minutes) on the traverse wall. However, with the exception of the hang board dead hangs, I found the dynamic climbing route situation at the rock gym too hard to manage, and eventually built four types of “system” boards inside my own facility.
Before I describe the system boards, it’s important to understand how I applied the duration and training categories in my programming.
My goal for the strength and work capacity categories was to have the athletes at near failure, a couple intervals in. For example, if I had athletes completing 6 Rounds of 1 Minute dead hang intervals on a hangboard, by the third round, I wanted them barely hanging on at the end of the minute-long interval.
Continuing with the hang board example, if I had the athletes begin hanging on the board’s “sloper” holds, and they were making the intervals easily, I would have them move to the 2-finger pockets for the next interval – a smaller, harder hold. By having the athlete move to the smaller holds, I essentially added weight to their barbell, and made the effort more difficult while keeping the interval the same.
This idea is what I built into MTI’s initial system boards – a way to quickly increase intensity while using the same interval.
In climb train programming, there are 6 ways to increase intensity under the same duration:
(1) Same Holds, Increase wall angle
(2) Same Wall Angle, Decrease Hold Size
(3) Same Wall Angle and Hold Size – Add Weight to the Athlete in a backpack
(4) Same Wall Angle and Hold Size – But Don’t allow the Athlete to shake (both hands must be on the wall or tool at all times)
(5) Same Wall Angle and Hold Size – But make the Athlete have constant movement (no shaking and no hanging on in one place)
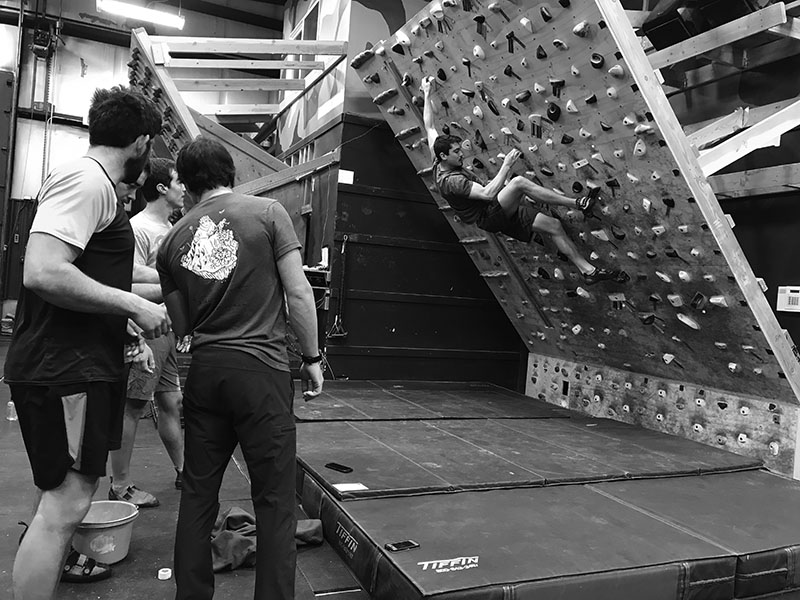
Ultimately, for rock climbing, we ended up building four types of “system” boards:
(1) Shallow (10-degree) board with easy holds used primarily for stamina efforts (4+minutes)
(2) Tech Board (20-degree) with moderate holds used primarily for work capacity efforts (1-4 minutes)
(3) HIIT Board (45-degree) with easy holds for strength efforts (<1minute)
(4) Campus Board (10-degree) with hard (small) holds for strength efforts. (<1minute)
Importantly, these “system” boards did not have climbing routes designated – they are not bouldering walls. Rather, they had the same, uniform holds throughout – so our work would focus purely on fitness, not climbing technique.
Programming and Progression
The time under tension programming methodology, and our four types of system boards, gave me the ability to finally build simple training cycles and individual training sessions, which included straightforward progressions.
Our training cycles evolved to be multi-duration, in the sense that in the same 6 week training cycle, we would concurrently train strength, work capacity and stamina often using our fluid periodization methodology.
We could build individual training sessions focused purely on short durations and strength, medium durations and work capacity, or long durations and stamina. Or … we could design individual training sessions which trained two or more durations. The 60-minute training session example below hits all three:
Warm Up:
- 5 Minutes easy system board
Training :
(1) 8 Rounds (strength)
- 1 Minute Campus Board (feet on), Constant Movement
- 1 Minute Rest
(2) 4 Rounds (work capacity)
- 3 Minutes HIIT Board
- 1 Minute Rest
(3) 2 Rounds (stamina)
- 10 Minutes Shallow Board
- 2 Minutes Rest
In terms of Progression, using this time under tension approach I can easily “progress” this session … for example:
Warm Up:
- 5 Minutes easy system board
Training :
(1) 8 Rounds (strength)
- 1 Minute Campus Board (feet on), Constant Movement
- 30 Seconds Rest
** Note the decrease in rest between Campus Board intervals.
(2) 4 Rounds (work capacity)
- 4 Minutes HIIT Board
- 1 Minute Rest
** Note the Increase to 4 Minutes for the HIIT Board intervals
(3) 1 Round (stamina)
- 20 Minutes Shallow Board
** Note the increase to 20 minutes for a single effort.
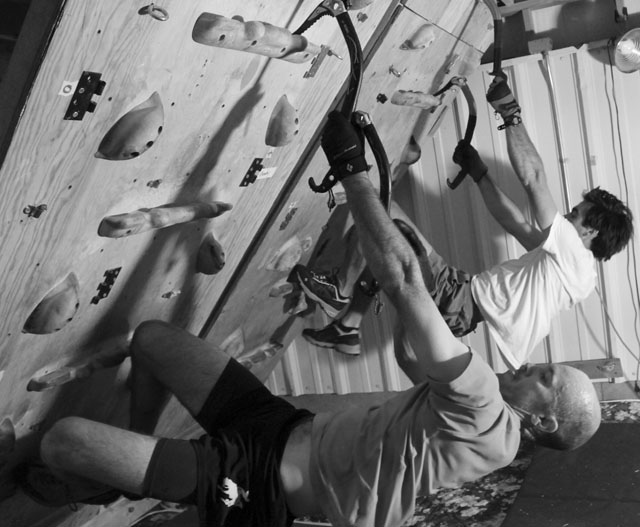
Above: Campus Board Lock & Reaches for training strength
The Moon Board and Our Latest Programming
Late this November, we completed a 7-Week Rock Climbing cycle where I tested some new programming which included two new Moon Boards we put in the gym last Spring. Moon Boards have been around for some time, and are super-efficient bouldering walls.
Essentially you purchase a set of holds, a set of LED lights for each hod, and build your own climbing wall from three sheets of plywood at a designated angle. Moon Board has a smartphone application that connects to the climbing wall via your smartphone and bluetooth, and allows you to chose different bouldering problems based on grade. When chosen, the blue LED lights for the problem light up on the Moon Board. The genius of the Moon Boards is they offer literally thousands of bouldering problems without changing or moving climbing holds – all on one 8×12 climbing wall.
MTI’s old system boards were great for training climbing fitness, but not for training climbing technique. The Moon Board, with its easily changeable bouldering problems based on rating, essentially gives us an entire bouldering gym full of routes on a single wall – where we can use the problem difficulties to train technique using the V-Sum efforts.
For this most recent cycle, I used short campus board working intervals and lock and reach efforts to train strength, V-Sum efforts on the Moon Board to train work capacity, and long efforts (up to 40 minutes) on our shallow system board to train stamina. We’ve only received a little feedback from the field, but my climbers report they are climbing at their highest levels ever. More to follow …
Questions? Email coach@mtntactical.com
Comment? Use the form below
You Might Also Like MTI’s Rock Climbing Pre-Season Training Plan